Breaking my 5th Metatarsal Bone – Spiral Fracture

It happens so quickly – but messes up your life so much!

03 Apr 2016 – The fall (W1)

It was a lazy Sunday afternoon, I’d started to clean the back garden and even done a spot of painting. I headed downstairs and thought I was on the last step. I wasn’t, I slipped on the next step down and landed really badly on my foot. The pain was intense! Very much like stubbing your toe really hard. Since I’d never broken any bones before I had no idea that I’d done anymore than badly bruise my foot. I managed to walk upstairs again, have a shower and have a lie down.

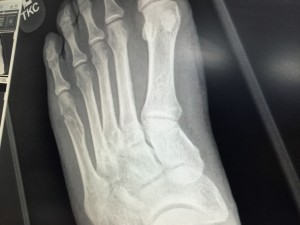
But unlike a stubbed toe – the pain only seemed to get worse and I pretty much knew that I’d done something bad. The pain seemed to come from around my toe and I figured I’d bruised or broken one of my toe bones. In my head it wasn’t a big thing, I’d just get a bandage around my toe and take a few days off work to let it heal a bit. But figured I should go to the hospital anyway to get it checked out. So we headed to hospital, by now, the foot was becoming quite painful. It was a Sunday night – the worst time to go to A&E in the UK! 3 hours later I had an x-ray taken. This is what came back

5th Metatarsal Spiral Fracture

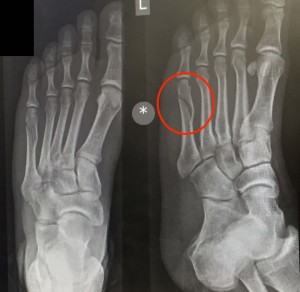
What I thought was a small hairline fracture turned out to be a pretty big spiral fracture of the 5th Metatarsal! I couldn’t believe it! The nurse then said, it’s going to need a cast. This was the last thing I had been expecting all night! Because it was late at night she put me in a temporary cast to keep my foot still until I could see the Doctor in the Fracture Clinic. It was a pretty ugly cast to be honest, and it was up to me knee! It just came as a total shock to me to all of a sudden have this lumpy heavy thing attached to my leg – and there was nothing I could do about it.

This wasn’t the end of it! Because so many people develop DVT – the NHS has started to prescribe Clexane (blood thinner) to all those with a leg cast! So we had to wait another 2 hours to see a doctor and have blood tests (at 2am in the morning!). I was then given a course of injections which I need to administer myself on a daily basis. They also gave me crutches!

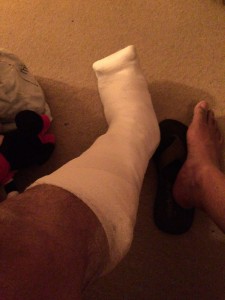
It was 10 days before I could be seen by the Doctor and in that time I was wearing this cast:

My First Leg Cast

Useful Tips for a cast and crutches!

  • I started taking bone supplements (Vitamin D, Calcium, Magnesium)
  • Upped my intake of protein
  • Bought a bath stool off Amazon as it’s impossible to shower without one!
  • Bought a Limbo to keep my cast dry (really great product)
  • Bought a second pair of crutches so I wouldn’t have to carry both up the stairs (I could leave one at the top!)
  • Get a backpack so you can carry stuff around – you literally can’t do much when you first start using crutches
  • Plan everything in your head for the next few hours, you don’t want to go downstairs and find you’ve forgotten something!
  • Make sure you have some baggy trousers, casts are pretty big!
  • Dramatically cut my coffee consumption!
  • Stopped drinking
  • Lots of Vitamin C is key in the first 2 weeks!
  • Eskimo oil capsules – amazing for stopping itching!

So for 10 days I basically hobbled around home doing my work and trying to cook dinner for myself. It’s hard at first then, but your other leg tends to take over and soon enough you find that you can stand on your good leg like those flamingos. Planning is key, make sure you mentally map out what you want to do for the next few hours so you can put everything into a bag and take it with out around the house. Have a central place where you’ll spend most of your time and make things convenient for yourself. Mine was the kitchen and I put plastic bags around for bins and put sugar and tea on the kitchen table so I wouldn’t have to move around so much.

14 Apr 2016 – (W2) Seeing the Doctor for the first time

He cut off my cast and told me that my fracture was quite bad and it would probably take a little longer to heal. He asked if I wanted

  1. Have a new cast fitted – one which was a bit more carefully done
  2. Have a boot fitted
  3. Leave it as it (which he didn’t really recommend)

I asked if there want any advantage over the suggestions? Was any better? He said that the boot and the cast were exactly the same. The only difference was that the boot was removable so you could shower and clean your leg. He also said that I should keep the boot on for 2 weeks all the time (even in bed)  and definitely keep the weight off my foot. He said that after 2 weeks I should start to put a little bit of weight on my foot and gradually build it up. He also said that after 2 weeks I should be able to not have to wear it in bed either.

To me it sounded quite soon, but he was pretty adamant that the bone would heal at it’s own pace and putting weight on it after 2-3 weeks wouldn’t cause any issues. I was a bit torn between a cast and a boot – a cast seemed better as it would make sure my foot was in a single place all the time, surely better for healing? But I’d been wearing a cast for 10 days and it had started to become uncomfortable! So I chose the boot in the end – I liked the idea of not having to wear it in bed and also being able to put some weight on it which hopefully should mean that my muscles start to get used earlier.

My next appointment is May 26th!

15 Apr 2016 – (W2) The Boot

I’m still in two minds as to if I should have got a boot. The problem with the boot is that it’s much bulkier than the cast. You can wear trousers over it so you need to take your foot out of the boot and then put your trousers on and then put your boot on. Which sounds fine, but it’s bloody painful when you do it because you have to re-do the whole boot up and tighten it. So for about an hour after you do it, there was a lot of pain (which I never got with the cast)

The up side though is that it was lovely to shower without the cast and to see my legs again! Also, I could see that I’d already lost muscle control of my toes, they only moved a little so I’ll try and do more exercises.

I’ll update more in a week or two to tell you how it’s going!

18  Apr  2016 – (W3) The Boot Update

So it’s bee two weeks since my fracture. Having the boot means I can see my foot in the clear and can see when it swells and how much my leg is starting to wither away. Honestly, the muscle that was on my leg is just a flobby piece of fat at the moment.

The boot has been OK. But I have noticed a few things with it. First, I wake up in the morning with a pain in my foot – its localised at the site of the bone break. Since I never had any pain in the cast, I can only assume the boot is causing this. The pain normally wears off after about an hour of being out and about. The boot generally feels good during the day and to be honest I’m starting to notice it a lot less during the day. I still feel uncomfortable taking my foot in and out of the boot as it’s always a little painful and I’m aware that I’m moving the bones about, however, I’m going to assume since the Doc did say I can not have it in a cast that or  boot that generally, there is pain to be expected and that it’s to move the foot every so often.

I will also say that I’m getting a little more confident about putting some weight on my foot. Whilst I haven’t done this yet, nor will I until another 10 days, I am feeling that my foot is getting a bit stronger – and apart from the early morning pain, it’s generally good during the day.

What the doctor said about milk

He said milk will not help whatsoever. He did however say that Vitamin D is vital. Since I’m Indian I need to eat more Vitamin D than normal – so the best advice is to grab as much sunshine as possible. So I spent the whole of yesterday out in the garden 🙂 I also am taking supplements. Protein is also a big thing, protein is vital in Bone growth so I’m trying to make sure I have lots during the day. So i’m eating cottage cheese, chia seeds (which also have lots of other goods things) and generally fish or chicken.

25th April 2016 (W4) – I can feel it getting better

Something strange has happened over the last week. I can feel my foot getting better. Before, I had pains in my foot and generally had to be very careful anytime I moved my foot about. But over the last 4 or 5 days the foot seems to have become a bit stronger. I noticed that I could push my foot into the sole of the boot a bit harder and it didn’t ache like it used to. And also, when it was out of the boot, it didn’t ache as much when I let it ‘just be’ (no weight bearing though). On Saturday, I put a small amount of weight on it and, whilst it felt very weird, it didn’t hurt as much as I was expecting. Since then I’ve tried to keep to boot off during a few hours in the evening so I can bend my toes and get used to moving the ankle up and down a little. From this week I will continue to put a small amount of weight on it and from next week will try and start putting more and more weight on it to see how it goes. Just very strange how just a week ago, I was waking up with lots of aches in the foot, and now it seems to be much stronger!

29th April 2016 (W4) – Weight Bearing

Yay! Over the last few days I’ve felt confident enough to start putting weight on my foot! It’s happened really quickly, I was feeling that my foot was better and I decided to try and take a few steps. The first thing was to just stand with most of my weight on my right foot and rock a little onto my left. When that didn’t hurt I had a go at walking a little with the aid of crutch. At first it was awkward and there was some stabbing paints at my heel, but that quickly went away and within 10 minutes I could take little steps. I now take my boot off in the evenings and walk slowly between the front room and the kitchen. Yesterday, I was walking in the office without the boot and whilst by the end of the night it was a little painful, i’m feeling much better about my foot now. I’ve been told lots of stories about the 5th Metatarsal bone taking a long time to heal and not to be WB (I almost didn’t get a boot because I thought it would be better to leave it in a cast for 6 weeks!). But I’m glad I got the boot, the foot is obviously still healing but using the bones and muscles helps to remould the callus and hopefully add some strength to it.

So for anyone reading this, by week 3.5 my foot was strong enough to start bearing weight. My advice at the moment is that you should start to notice when your foot is stronger, if you have a boot, try and wiggle your toes each night and every so often push into the sole of the boot. When that action starts to feel OK and stable (it doesn’t hurt, or feel weird) then start experimenting with putting a little weight on it, and see how you get on!

05 May 2016 (W5) – Getting better, but cautious!

I’m now in limbo land. Over the past 5 days I have been regularly walking without my boot on. Very slow and with a limp, but the foot can bear my full weight now. I can even balance clumsily entirely on the bad foot for a few seconds. However, I’m very aware it’s not healed properly. The wrong twist (or someone stepping on it) is incredibly painful. The issue now is that whilst i’m at home I obviously like being able to walk about normally (all be it with a limp) and to be able to carry things with both hands. I can also sleep without the boot on now. This is all really positive, but I am aware that putting too much stress on it, is probably not a good thing. So for the half the day I keep the boot on, and I’ve reverted to keeping it on at night. That’s 8 easy hours that I can keep the foot still and in place and I don’t get annoyed by it.

Currently I can walk on the foot for around 3-4 hours without the boot, and then the muscles get very tight and I need to put the foot back in the boot. But the sharp stabbing pains that used to be there when I put pressure on my heel have now gone.

For now relatively happy with progress!

12th May 2016 – Ups and Down

I’m fast approaching the 6th week of my accident, and things are looking really good! Since last night, I’ve not worn my boot and my foot is feeling OK! The last week has been all sorts of ups and downs, in my last post I had just regularly started to go longer times without my boot and putting full weight on it. However, there were a few days where my foot was very sore. I think this was because I was using my foot normally. When you first start bearing weight on the foot, you’ll not be walking normally, you’ll be walking in a way which reduces the stress on that foot, and not using your regular walking muscles. So now that slowly you start to use them, they moan and ache until they eventually capitulate and start to strengthen.

I remember when I was first told I needed to have a cast and the nurse said it was 6 weeks, I was horrifed! After reading other people’s experiences, I’m very happy it has happened within 6 weeks – I still have a way to go, for example, my calf muscles on my left leg are very tight in the morning so need to figure out how to stretch them. Tonight I’m going to head out my shoes on both feet for the first time! Yay!

May 26th – Discharged

So it’s been 2 weeks now since I wore the boot! And things are getting better (slowly!). The transition to barely being able to put weight on my foot to being able to stand on both of them seems relatvively quick now, but the progress from being able to walk and being able to walk normally looks like it’ll be a bit of a long slog.

So – two weeks ago I took the boot off for good and decided that I would start wearing shoes again. The first time everything had to be slow. I used to take my crutches with me just so people knew why I was walking slowly. But after a few days I just walked without them with a bit of a limp. There is definitely a difference between walking without shoes and walking without shoes. The first time I put my foot in a shoe, it was quite painful to push it in. Walking on it involved a fairly noticeable limp and you don’t walk ‘normally’. But I’ve made sure to keep walking on it and to go out for a bit of a walk everyday.

This has helped and now I can walk fairly normally (still a bit of a limp) but I can tell this is starting to go away. I walked about 2 miles on Sunday before my foot got really tired. My foot still gets tired but now after a fairly long day of standing or walking on it.

Went back to the fracture clinic today and had another xray taken. Here’s the how’s the bone has healed (First pic is 1 week in, second is 7 weeks in)

5th Metatarsal Spiral Fracture after 1 week

How my bone has healed after 7 weeks

How my bone has healed after 7 weeks

Basically, you can still clearly see where the break is, but the insides you can see a whitish haze which is the new bone building up. The doctor said it’ll be another 4 weeks before I can play any sports again, so I  just need to keep walking on it and using it until the bone is completely filled in and i’m ready to break it again!


FPL Data – Download 2014 / 2015 for Barclays Fantasy Football here

Link

FPL data Download for the high level data I captured during the 2014 / 2015 Barclays Fantasy Premier League season. I don’t guarantee 100% accuracy – but they give a good view of each players performance during the course of the season. I’ll be adding a variety of CSV data downloads for this season on a regular basis so keep an eye out once it starts.

Download Here

The Data Points are:

  • Player #
  • Player Name
  • Team
  • Position
  • Points
  • Value
  • Selected By
  • Average Points When Played
  • Goals Per Minute
  • Goals
  • Assists
  • Clean Sheets
  • Home Score Rate
  • Home Assist Rate
  • Home CS Rate
  • Away Score Rate
  • Away Assist Rate
  • Away CS Rate
  • Times Over 9 Points
  • Points from last 8 games
  • Points from last 4 games
  • GW1 to GW33 points

The Mongol Rally – Advice for Ralliers from Team Infinity and Bataar

Some Mongol Rally Advice! Every year, hundreds of people around the world google for hours trying to get a glimpse, a feel, some subtle hints about what they are about to face in one of the greatest (and mostly safe) road trips you can do. Personally I downloaded podcasts, read some blogs, checked the facebook posts on an almost insanely regular basis (I am no longer on facebook for my own sanity).

In the end, nothing really can prepare you for the rally, and in truth, you shouldn’t really try to either. Whatever your grand plan is for the rally, it’s not going to happen that way. You will probably break down, and it will probably happen in Mongolia. You will get tired and frustrated with your team, but you’ll forgot those memories very quickly. You will take dumps in the wastelands of central asia, and you will meet the most amazing and humble people in the world. And you’ll somehow manage to do this mostly without the internet and mostly by your own wits.

But there are a few things on the rally we could all benefit from knowing beforehand, and the things below will in no way I hope make the trip less adventerous. Some things just don’t need to happen, or you need to experience. And sometimes you just need a bit of re-assurance about things. I hope the below is useful to you and helps make your rally an incredible adventure, as much as it was for us.

1. What to Pack

You'll always find a space

You’ll always find a space

Deciding what to pack can cause you sleepless nights and many an argument. Basically you have a tiny car and it’s got to fit all your bags, tents and sleeping stuff as well as all the necessities of life for a 6 week trip.

My advice is to pack light. Honestly. Look at our car. This was a fucking nightmare everytime we needed to find something. Eventually we re-organised and put a plastic set of drawers in the back which helped considerably. Being organised in such a way that all the stuff you’ll need on a regular basis is at hand, and all the stuff you’ll never need is tucked away in a corner helps. But this, you will figure out by week 2 once you start camping properly.

Other Advice

Here’s my advice:

  • Bring lots of wet wipes. There will be plenty of days when you don’t shower. These will help! Don’t overload your car with them, buy them as you go along, and keep a stash for mongolia as they won’t have them there
  • Funnel – it’s no fun pouring petrol from your jerry without one. If your jerry can has a built in hose, then even better (saves even more space)
  • You only need one jerry can – don’t bother taking two. There are petrol stations everywhere
  • Wratchets – bring lots of them, they’re useful
  • Lights – once you get out of europe, you’ll be camping by the side of the road. Bring head torches (essential) and small lamps you can put around your campsite. Trust me they make a huge difference.
  • Cable-ties, bring all sorts of sizes, medium and heavy duty are a must
  • You will need a tow-rope – definittely
  • Bring two pots
  • You don’t need a solar shower or any kind of plastic gimmick to store water. Food and water is everywhere. Basically, until you hit Mongolia, you’ll be going through populated areas.
  • With respect to food, as above, bring some treats but don’t bring those stupid pre-packed survival food. They are expensive and waste of money. Every so often we would pop into a shop and stock up on a few days worth of food. Pasta and sauce is everwhere. We sometimes bought meat and made soup or broth. Basically, if you can chuck something into a pan then you can eat it and it will taste fine. As the rally progresses, you will get less and less hungry. Honestly, you’ll be surprised how little you eat through the day. Once we survived on bread, salt and olive oil for a day.
  • Make yourselve a little card with all the exchage rates for the countries you’ll be visiting
  • Gas stoves? One of our teams bought one and they lasted until mongolia (with a couple of refils they bought along). We bought one of those fancy mountain ones where they run off your petrol. A gas stove means you have to carry around a couple of bottles which can take up a lot of space. If you can fit them in your car, then they are a winner as they cook quick and are zero phaff. If you’re running low on space, get a petrol cooker (less space, more phaff)
  • Money – make sure you bring dollars! Dollars will pretty much pay for anything after europe. If you are going to turkemenistan, you’ll need around $100 per person just to get in. Don’t get caught out! Stuff the inside of your car with dollars and make sure it’s hidden – trust me on this
  • Currency exchange – after europe you can exchange at the borders, usually you get very good rates. Pay bribes in local currency, it’s always cheaper.
  • Bribes – Bring alcohol (mini ones) and lots of good quality american cigarettes. Bring weird things such as CD’s, pens and ‘ornaments’. Often you can reduce a bribe with a pack of fags or just keep someone off your back with a CD. We got out of a bribe by giving a guard a pen and a lighter! Be Creative
  • Paying Bribes … you’ll figure this part out. Never show fear, just smile and act like you expected it. It pays to pretend you have no idea what they are talking about, or understand what they mean. Often they’ll just give up. If the guard looks evil, he probably is, just give him the money
  • Stand your ground – border guards will attempt to make you buy insurance from their mates, you only need to buy car insurance after you cross the border, never before. If they are making you buy it before, just wait it out.
  • Don’t cheat and use any kind of satnav, buy maps at petrol stations. It’s more fun and it’s easier to eask directions using a map.
  • Learn Cyrillic, it takes a few hours in the back of the car, and it’ll really help on your travels
  • Look under the car, anything that can be knocked off, take a spare of it (like oil filters etc)
  • Take spare wheel bearings and back wheel springs (see my other prep-post for rubber spring assitors, make sure you use them!)
  • Don’t buy a big tent for everybody to sleep in. It takes forever to put up and you’ll almost certainly be annoyed at the lack of privacy. Privacy is something you miss on the rally. Being able to go into your tent at night without anybody else around is bliss, you can lie in your own thoughts and de-stress. This is one of my biggies, I was so glad we took those 10 second pop up tents, they never failed, low maintainence, and easy to put away. But they take space, so if you can afford it, I would get them, otherwise, small one man tents don’t take too much space.
  • Bring a swiss army knife and a chopping board and wooden spoon. You won’t need much else
  • Bring a small shovel for when you need to take a shit
  • Bring loads of music and an FM transmitter if your radio is shit and can’t plug into your phone
  • Bring some basic tools
  • Make time in your schedule to stop at places for more than a day, you’ll get agitated about going places and having to keep moving. Make sure every 5 days you put contigency into your plan to stay an extra day here or day, your body will thank you
  • Convey! Don’t do the rally without staying in a convey once in a while. Everybody needs a change of scenery and somebody to exhange stories with. If you find a great bunch of people, stay with them as long as you can, you’ll form a strange bond that stays with you forever
  • Always keep beer / alcohol in your car – there will be days when even a warm beer makes everything better. If no beer, buy beer. If no vodka, buy vodka.
  • Don’t eat any meat in Turkmenistan. Don’t get caught out by exchange rates in Turkmenistan
  • Don’t attempt to drive to Hell’s crater in Turkmenistan once you find the turning off the road. There are guys with 4×4’s who will take you there, your car will never get there
  • Camp out on a beach at least once
  • Change your routes and plans every so often
  • When you get to Altai in Mongolia – get the mechanic to …. ha – I deleted this last sentance for your own fun and benefit. Trust me
  • When you get to Mongolia, try the Booz (the fatty dumplings) – they are incredible
  • Mongolia is cold, make sure you have something to keep you warm when you get there.
  • There are good roads, ok roads, and shitty roads. Try and do the shitty roads early on so you know what to expect. Avoid the shitty roads the closer you get to Mongolia. Mongolia is (or was) all shitty roads
  • Crime mostly happens in UB – and not on the way to UB
  • 83 petrol works in your car
  • Take lots of sharpies and get locals to ‘tag’ your cars
  • Take a tarp
  • Most people in eastern Russia are incredibly friendly and so nice
  • Kazakhs don’t like Borat

More to come ….

My Caffeine Withdrawal Symptoms

If you’re reading this page, you’coffee-3ve probably recently just cut caffeine out of your life and are currently experience the dreaded caffeine withdrawal symptoms! How did it get to this? As far as you knew, you were drinking a harmless cup of coffee every morning, and the one day you decide to give it up … and then it happens. The headaches, the fatigue, the aches, the itchy eyes, how can something so lovely turn out to be something so horrible!

How is it going for you right now? If you’ve read my previous post on “How to make the perfect cup of coffee with your Chemex” – you’ll know I love coffee. I bloody LOVE coffee. I started when I was about 7 when I would share my Dad’s cup of coffee. Back then it was instant – some might call, ‘weak’ coffee. Then the starbuck’s style coffee shops came along and I quickly graduated to the hard stuff, espressos. At university, it was still those days where it was uber cool to sit in a fancy starbucks and take up whole sofa for the day and spend £10 on the black stuff. Eventually, I realised I was drinking a lot of this stuff. I’d known it for a while, but starting a new job, piling on the pounds, and feeling generally unhealthy, made me quit.

That’s when I realised how addicted I was to it. The headaches were unbearable, the fatigue unlike anything I’d ever experienced before. I couldn’t function at work, everything in my mind became a fog – and honestly, I just couldn’t be arsed to do anything. I managed to do 4 days before having my first coffee. Going cold turkey was my first experience of what a Heroin addict must feel like in equal situations.

Obviously I didn’t stick to it and in no time I was back on the coffee (although in reduced amounts). I just love the taste so much.

The Symptoms

I’ve tried many times to give up caffeine (and by proxy coffee). Generally my caffeine dipendenza-da-caffeina
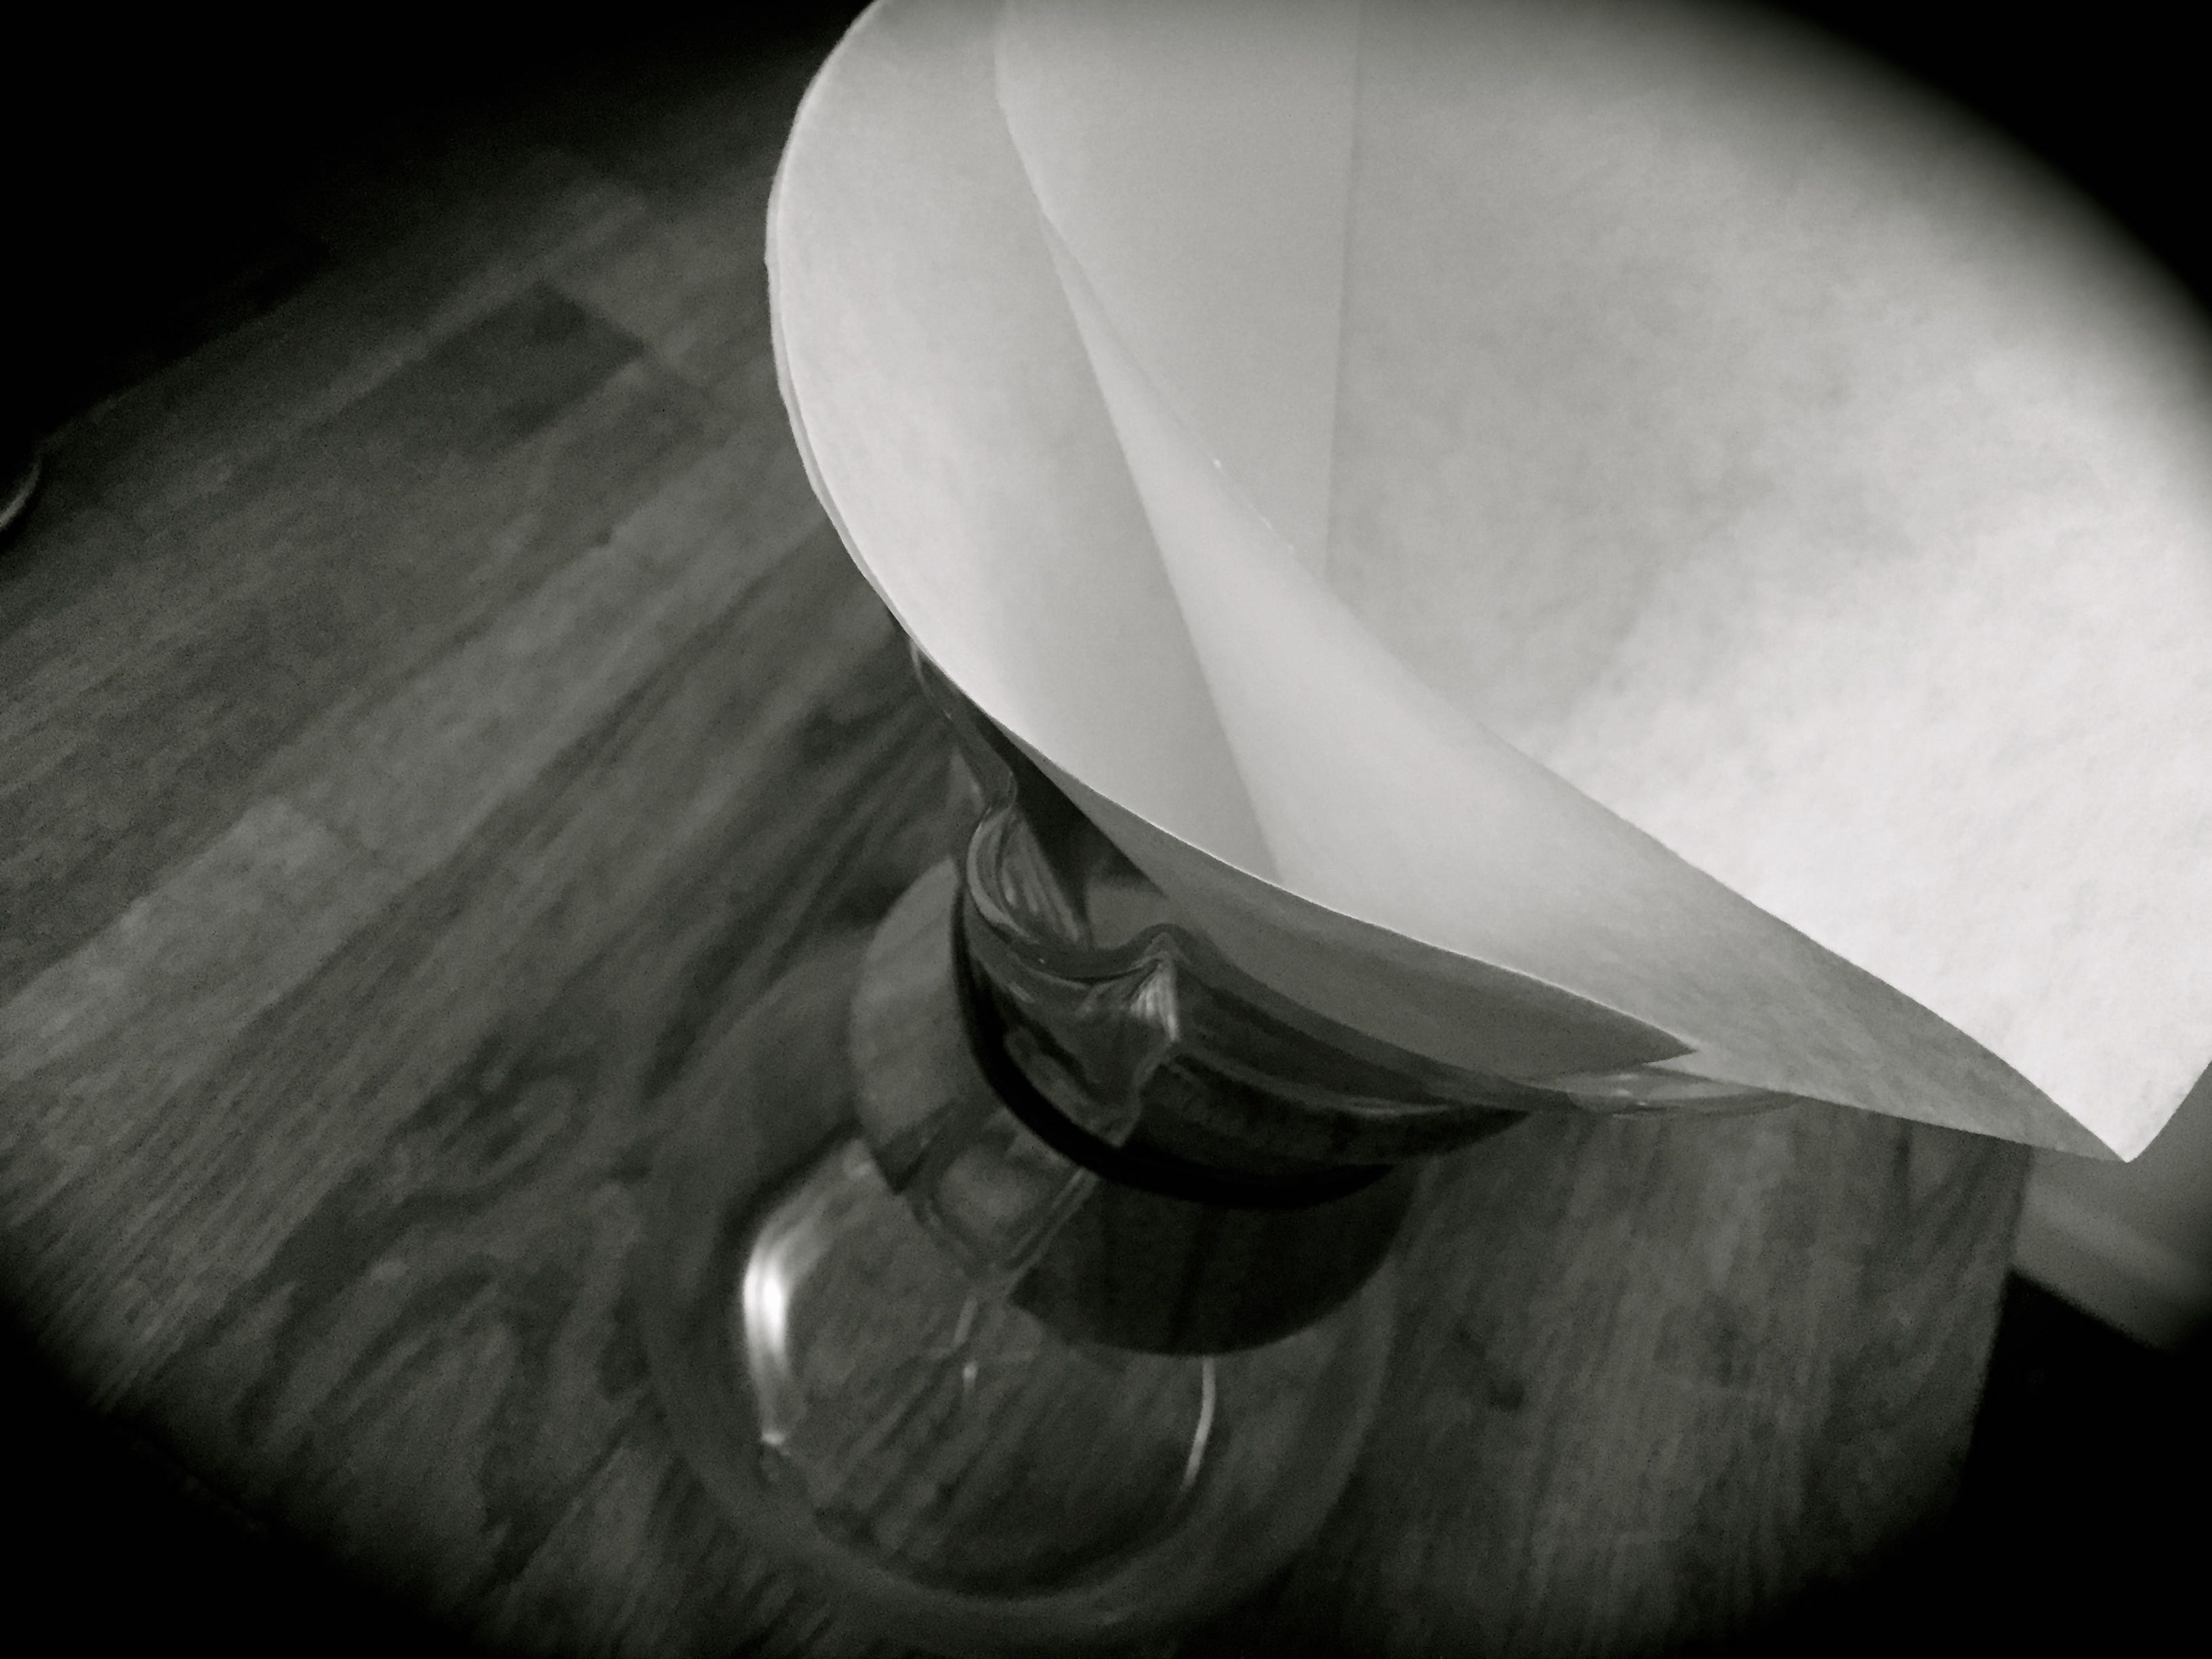
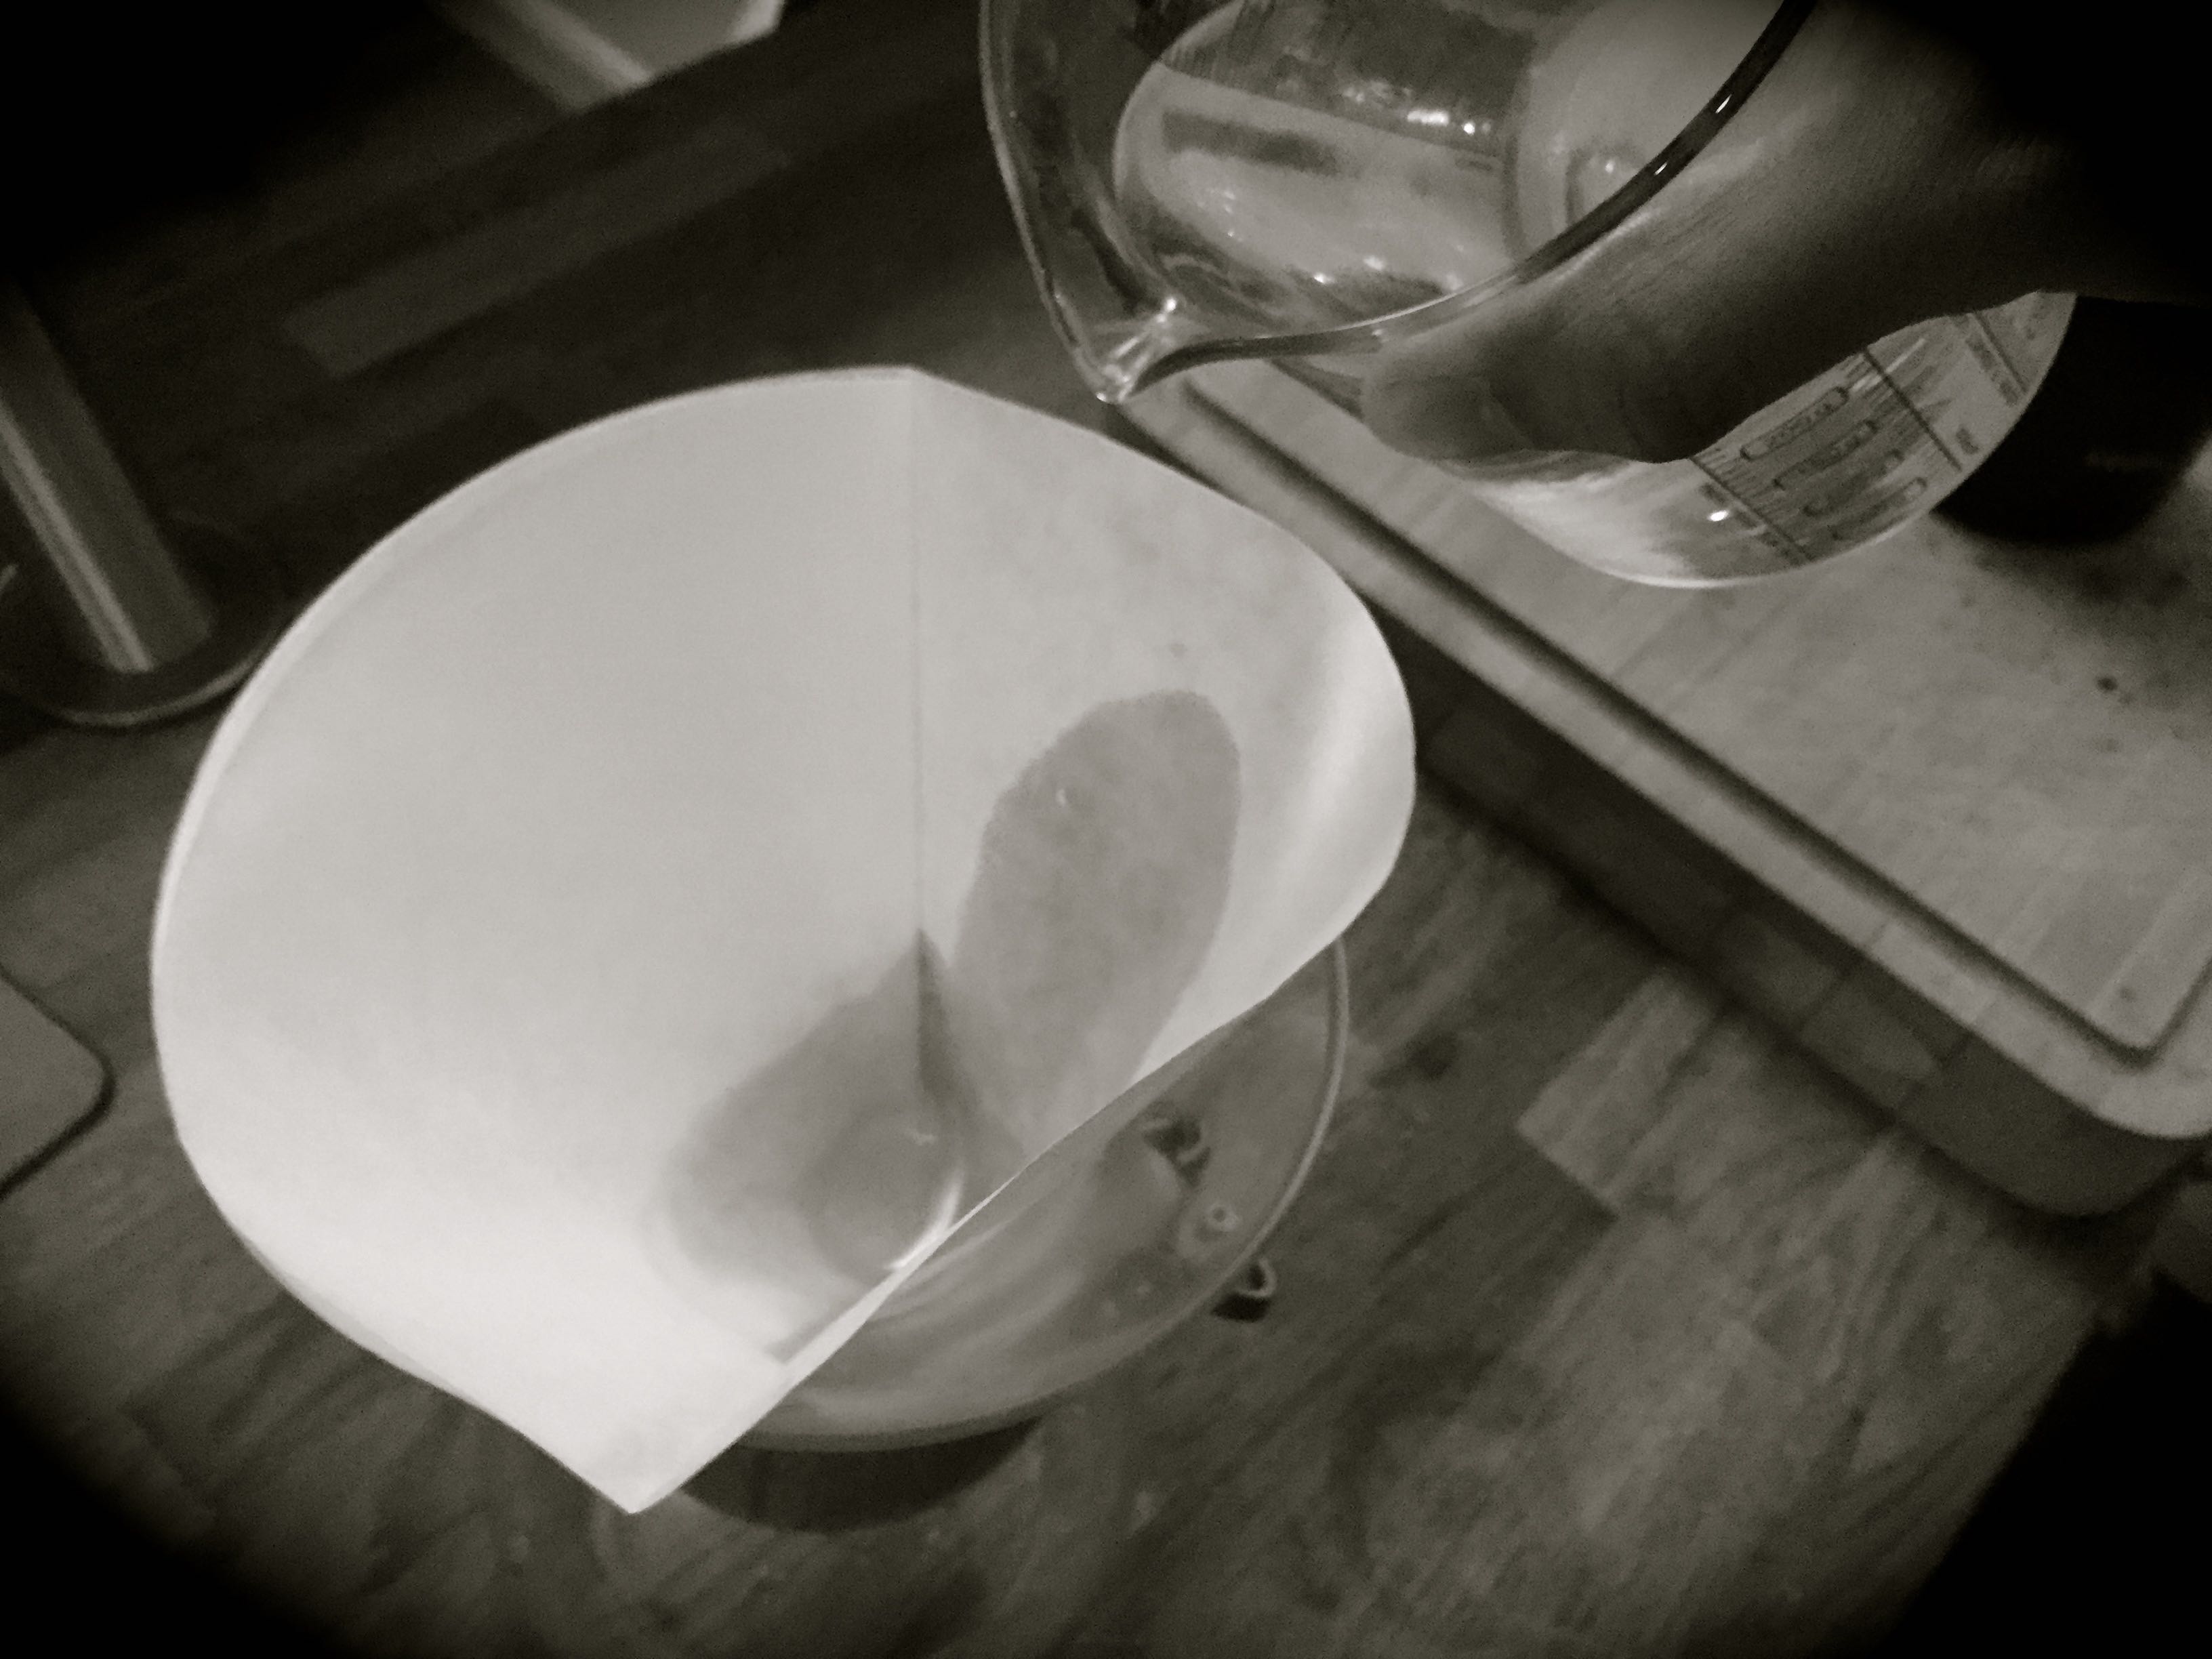
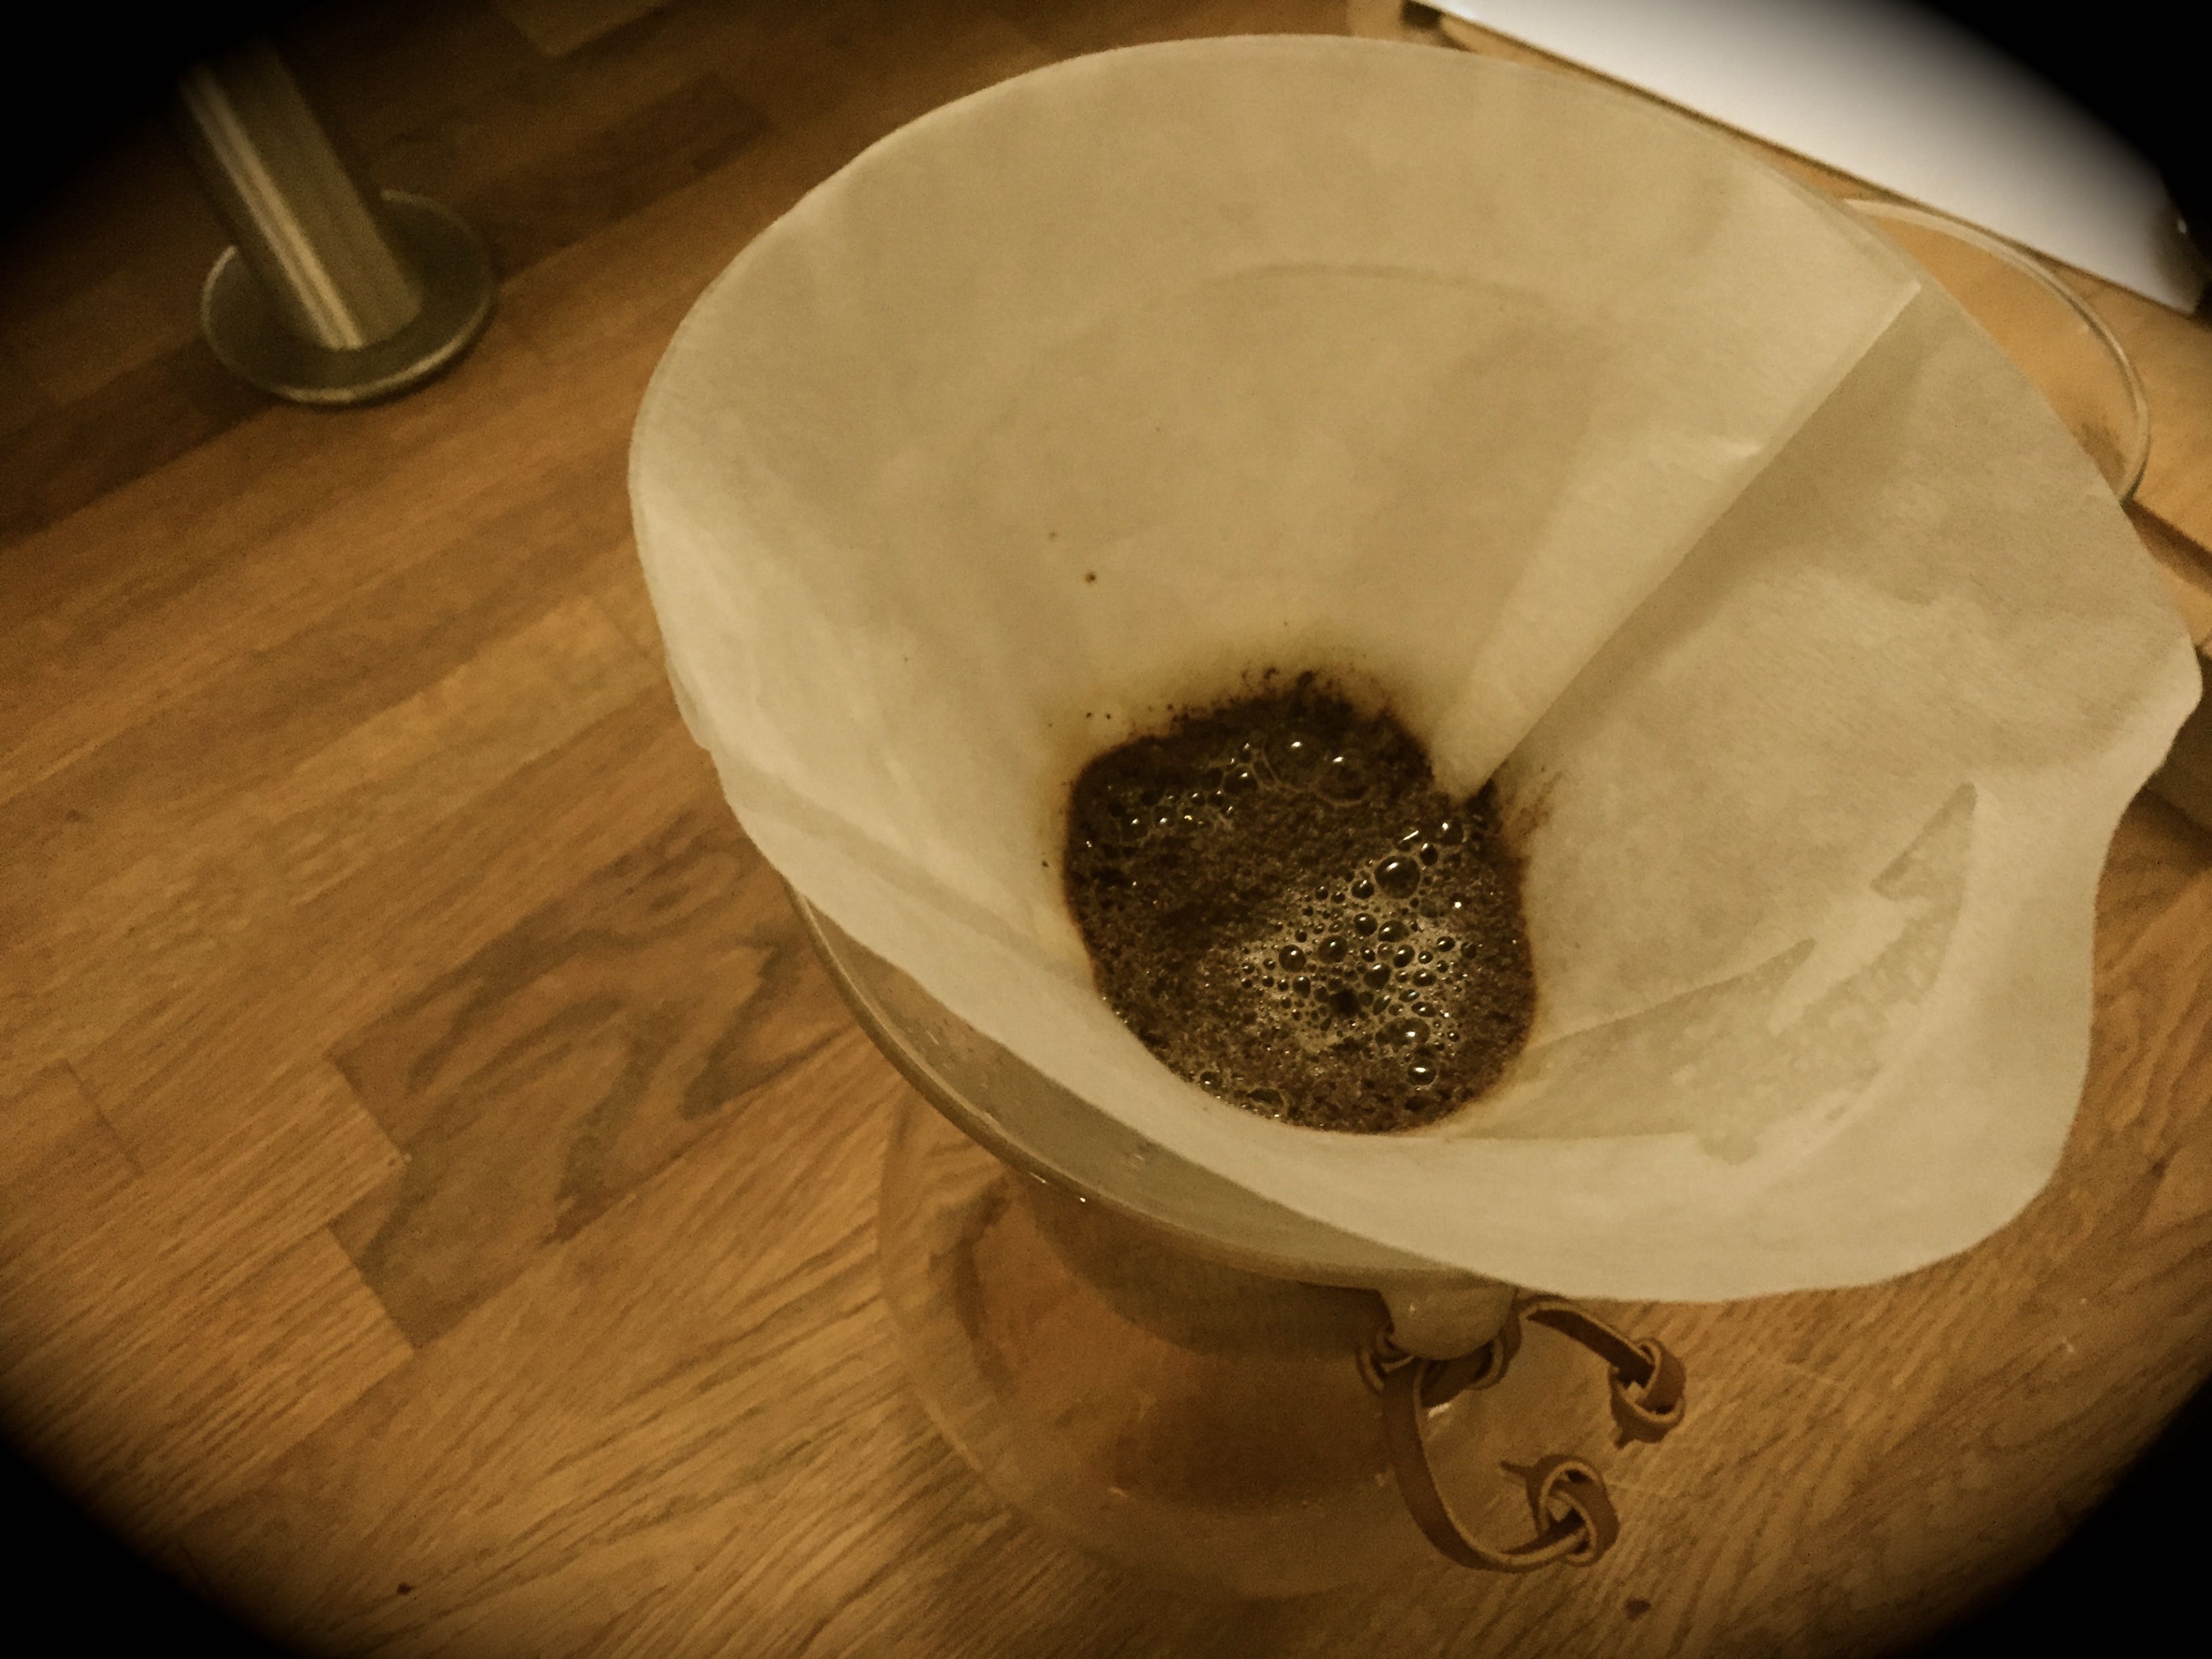
intake is this, 1 double shot espresso in the morning, and 2 to 3 cups of tea during the day. This is about 170mg a day. However if I work from home, it’s usually 4 cups of chemex coffee. Here are the common symptoms that always accompanied by me giving up:


SymptomDescription
FatigueThis one always happens. It's a fatigue which just knocks you off your feet. It's like your body has all of a sudden thinks you've not slept for a months and is now trying to catch up. The first day you quit caffeine, all you will want to do is to go to sleep. And if you do go to sleep, you will absolutely conk out. The fatigue is relentless and honestly, it never really went away from me. I'm currently into 1 week of not drinking coffee (I still drink tea) and I still get insanely tired during the day. I've not yet got to a point where I feel like I'm normal, but I hope it will happen this time!
Lack of concentrationIf you have anything important planned during the caffeine withdrawal period, forgot it. Your brain is going to limbo land. A dense fog will descend upon your mind and not leave for a while. Your brain basically seems to stop caring about anything (apart from sleeping). You will be lethargic and you will have no desire to do anything! For me, these symptoms usually last about 4-5 days. I'm now one week in and my brain still feels a bit crappy, but usually you find that your mind thinks a little bit clearer over time
HeadachesThese are horrible migraine like headaches! The first few days they are intense and they usually are worst behind the eyes. The combination of fatigue and headches contribute a lot to point 2, your head hurts so much, it becomes incredibly distracting and most people end up taking some painkillers for it. Painkillers thankfully do hurt. A week into my reduced caffeine period, the headache has become a dull pain, it's constant but I can tell it's starting to disappear.
Irritable eyes I haven't read this on any other site, but my eyes became very heavy. If it touched them, it would be painful. The worst part was how they never seemed to open fully. I would have to physically pry my eyes open to get them to open properly. Also, they would become more watery than normally. I basically looked like I was squinting all the time!
Depression & IrritabilityYou basically stop caring about the would and things become un-important. Also, I noticed that because you have low energy you become a nightmare to live with. You stop wanting to go out, you get bored of people's conversations, you want to lie in bed all day and watch crappy TV shows. I always get really irritable and become a big moany bastard. It's really not nice and honestly, I'm sick and tired of it.
Flu like symptomsAches and Pains - Thankfully this one only happens when you first start. You'll feel like you have the flu, I had a runny nose and my muscles in my leg always hurt. The first two times I tried to give up caffeine, it always seemed to coincide with a cold, I thought I was just unlucky, but it seems like caffeine withdrawal may be the culprit here.

The above symptoms are horrible. Honestly, there have been times when I’ve wanted to quit coffee and could never find the time when the effects above would not affect my work or relationship. So why bother? Why not just keep drinking coffee and not bother going through all of this?

The Science of Caffeine

I’m no scientist, but I am Indian and technically that makes me half a doctor and genetically I’m drawn to anything which is vaguely medical. First off, I’m of the opinion that anything which when you stop ‘doing it’ makes you feel physically worse and gives you symptoms similar to a heroin addict going cold turkey cannot be good for you. I don’t care what you say, that substance has altered your normal body chemistry and your body should function just fine without it. My girlfriend arugued that if you gave up water or food, you would equally be screwed, but food and water is essential for being ‘alive’. Caffeine isn’t.

Case_Study-_Caffeine_MoleculeSo how does caffeine work? Caffeine works in a number of ways. First, it stops your brain for registering a hormone which normally tells it to ‘slow down’ (more on this later). It also increases dopamine (which makes you feel happy) as well as acting as a vasoconstrictor. Not only this, it also increases adrenalin – which explains why you get that ‘on-edge’ feeling when you drink it. The sum total of these effects is that you don’t feel as sleepy, and you feel more alert and ready to do things. A warm cup of coffee after a boring meeting also makes me happy.

However, caffeine in small doses as a pick me up here and then is OK. As is everything in life. But when you continually have it everyday and in ever increasing amounts the caffeine will change your brain structure. Here’s how. Caffeine looks very very similar to a hormone called Adenosine. Your body releases this to effectively calm the neurones down so they don’t go crazy and keep firing at ever increasing rates. Adenosine is partly responsible for the sleepy feeling we get during the day. But it’s absolutely required and helps balance the neural activity in the brain.

Caffeine looks so similar to adenosine that it binds the the receptors that are looking out for them. However the key thing is that once caffeine binds to these receptors, it doesn’t produce the same effects as adenosine. When you drink coffee, caffeine stop the neurones from registering adenosine. Try drinking a double espresso at 9 in the evening and most people won’t be able to go sleep until 4 am in the morning. The reason for this is that caffeine has a half life of 6 hours, so at 9 pm, the sleep inducing adenosine can’t tell your brain to go to sleep, until finally at 3am, there’s enough free slots for the adenosine to slip in and finally send you to sleep.

Lets take a typical coffee drinker. He gets up and has his first drink. Mmmmm. He’s alert and rockin’. A few hours later, he has another coffee, and then another in the afternoon. During this time adenosine is being blocked in the brain. After a few weeks of this behaviour your brain is accutely aware that it’s not registering adenosine properly so manufactures more receptors. Your brain now becomes hyper-sensitive to adenosine. When you wake up in the morning, all the adensoine is absorbed very quickly and you feel drowsy. It’s only until you have your first cup of coffee that the receptors become blocked, and dopamine is released that you start to feel normal again.

Imagine this over years. Your brain now requires caffeine to be present to function normally, without caffeine, you feel drowsy, unable to ‘start’. Basically what’s happened now is that you need coffee to feel ‘normal’ again, not alert. To get that original ‘alert’ feeling you may have had when you first drank coffee, you would need to drink a lot.

When I walk to work, I see tons of people with lattes, flat whites etc and I just know that they are paying to feel normal. It’s so so easy to get to a position where coffee become normal, and I’ll be honest, It’s nice way to start the morning, a nice smooth hot cup of coffee. The question you have to ask is if you want to continue to be caffeine dependant. And to be honest, nobody has come up with a reason to disuade me that caffeine is fundamentally bad for you. Anybody who drinks a few cups of coffee a day doesn’t seem to be at any more risk of health problems than somebody who doesn’t.

So what’s my point? Personally for me, whenever I stop drinking coffee, I notice that my sleep dramatically improves and my mind becomes somewhat clearer. But, the benefits after a week or two seem to normalise and my sleep becomes a normal night’s sleep (rather than the deep sleep I was experiencing when I would first give up). There are blogs out there of people proclaiming that the effects of giving up caffiene dramatically changed their life, but for me, (after the symptoms disappeared) the change in my life was just a little better.

My view is that cutting caffeine slowly out of your life is a good thing, but having a few cups during the week is probably not a bad thing. My ultimate goal is to be able to miss a day without feeling terribly effected, but also to be able to enjoy the wonderful taste of coffee without feeling guilty.

How was your experience?

Making a perfect cup of coffee with a Chemex

There’s a lot of hype around the Chemex coffee maker, it’s a bit weird – especially considering it looks like a fancy scientific beaker! But the chemex really is a great coffee maker, and it’s totally replaced my nespresso machine. You really do make the perfect cup of coffee with a Chemex.

Making the perfect coffee with a chemex

A Chemex Coffee Maker

So to start. Is it for you?

If you like sugar or milk or cream in your coffee, then this probably isn’t going to be right for you. The reason is that the Chemex brings out the best flavour from your coffee beans, if you add milk or sugar you mask that taste. It becomes diluted, and tastes like any other coffee you could buy. It’s like buying a lovely couch and then covering it in plastic in order to preserve it, but all you end up doing is sitting on a plastic covered couch!

I only like Black Coffee! But doesn’t it take forever to make?

If you like black coffee, then you’ll really notice the difference in taste from the Chemex. The Chemex is basically a practical flask which has a nice place to put the filter. The filter is thick, and this removes all bitterness from the coffee. The slow filter process takes all the best flavours from your bean. What you’re left with is a mug of coffee which has so much flavour!

But there is a compromise! It takes time to make it. I would say around 5 minutes to make. But it’s actually quite fun to make and after you’ve got used to it, it’s never a problem because you know a good coffee is at the end of it.

What beans do I need?

I made a big mistake when I first bought mine. I thought any old bean would be fine. For me, the coffee bean is the single most important part of this process. The wrong bean can produce a horrid cup of coffee! So what beans should you go for? I have a local coffee shop which makes great coffee, so I bought my beans from there. However, I bought espresso beans and this created a strong coffee without much flavour.

My tip is to find a good coffee shop and try their filter coffee. Find one which you like and buy their beans! Always buy filter coffee beans! Whatever the filter coffee tastes like in the coffee shop, it’ll taste better in the chemex.

If you don’t try before you buy, then go for a mild bean. After the espresso beans, I bought Number 4 beans from a bean shop because ‘they smelt the best’. Don’t go on smell, go for a good quality bean which is in the 1 or 2 range (i.e. very mild). This is the best bean.

What do I need to make my first brew?

Get yourself some Chemex filters! Don’t use normal filters, the flask doesn’t make good coffee, it’s the filters. They’ll last a while and cost about £10 for 100. Bargain.

You’ll need some beans and a grinder. Since you’ll be pouring a lot, try and get a vessel which allows you to pour the hot water (or one of those kettles with a narrow spout).

Method

Ok, so you have all the above.

First, grind the beans. You just bought a Chemex to make the best coffee … so don’t skimp out on a grinder. Buy coffee beans and grind the beans as you need to. Trust me!

Filter in Chemex

First put the filter into the conical flask. The three layers should be covering the spout part as the picture above.

Next, pour hot water onto the filter. I tried making the coffee without doing this and the coffee has less flavour. A wet filter is good! Pour out the water that’s filtered through. So next thing is to add the coffee? I put 2.5 tablespoons in. This is good for two small cups of coffee or one large mug.

Wet Filters

Next is to make the coffee bloom, basically this is just a fancy term for, wet the grinds a little bit. All you do is to add a little bit of hot water so that it just covers the coffee grinds. You should see the air bubbling out of the grinds.

Making the coffee Bloom

I tend to leave it to bloom for about a minute or two. Once you’re bored, start pouring the water in. Pour at a slow rate in the center and move it around a bit. Nothing fancy, just keep the water pouring in the center.

Pour Slowly


And that’s pretty much it! Let the coffee filter through, take the filter out and then put back on the heat so that steam starts to appear in the bottom of the flask. Take off immediately!

How does temperature affect the taste?

One thing a baristta told me was that the taste of good coffee changes as the temperature falls. Don’t drink the coffee straight away, let it cool a little. The taste of the coffee is at it’s best at around 60 degrees, so just under hot.

Enjoy


Harvey’s Old Fashioned

I’ve tried many old fashioned’s in my time, and I think I’ve come up with a damn good version of it. It differs in many ways to the classic old fashioned, and this is because I think the addition of the orange and cherry is unecessary.

Couple of things. I use Monin sugar syrup which is a 2:1 ratio mix. Wherever you read 1 shot of sugar in normal cocktail books, half it if you’re using Monin. The monin syrup is exceptional, and I use it in all my cocktails

Start with

  • 2 shots of Bourbon (Makers Mark)
  • 0.5 Shot of Blended Sherry Cask Whiskey (Grants is the best – don’t use single malt)
  • 0.5 shot Monin Sugar Syrup (1 shot of normal syrup)
  • 2-3 drops of bitters
  • 1-2 drops of orange bitters

You’ll notice that I don’t use raw sugar here. The reason why Old fashioneds take a long time to create is because 1) you need to dissolve the sugar 2) you need to blend the water from the ice with the Bourbon.

Using sugar syrup works best in my opinion, it leads to a much more velvet tasting drink and takes considerably less time to mix.

Also, I don’t tend to use orange peel. You can, but I find that one or two drops of orange bitters adds the right flavour.

The Grant’s sherry cask adds a brand new dimension to this drink. Every person I’ve made this for has loved this addition. It softens the bourbon and adds a maltyness to the drink.

If you want to go the extra mile, wash the lip of the glass with a small / tiny amount of Absynthe.

Method

  1. Add the syrup and bitters to a heavy glass and mix well
  2. Add one shot of bourbon and two large ice cubes
  3. Mix really well, keep stirring. This is what makes the drink taste the way it does. Its the mixing of cold water and bourbon with the sugar
  4. Add two more ice cubes and pour over another shot of bourbon
  5. Again, mix really well for at least 20 seconds
  6. Finally add one or two more ice cubes (one if they’re very big, two if they’re small) and add the whiskey
  7. Mix well again and serve immediately


iPhone iOS SWYPE Emoji emoticons Phrases!

I got tired of not finding a list of phrases / shortcuts that work on iOS SWYPE for emojis emoticons – you know, when you swype a word, and an emoji comes up. So here’s what I know so far – thought it would be useful for others too! If you know any more, send them over!

Tested on my iPhone 6

Not an Exhaustive List – when I find them, I put them up


Emoji phrase
http://www.kffkr.com/wp-images/happy.png happy / smiley
http://www.kffkr.com/wp-images/grinning.png smile / grinning
joy
cool
sad / tears / sob
neutral
sleepy
http://www.kffkr.com/wp-images/wink.png wink
smirking
yum / delicious
http://www.kffkr.com/wp-images/tongue.png tongue
http://www.kffkr.com/wp-images/upset.png upset
http://www.kffkr.com/wp-images/disappointed.png disappointed / frustrated
afraid
triumph
confused
flushed / blushing
angry
weary
asleep
pensive
dizzy
relieved
massage
lad
girl
yay
fist
ok
yes
no
one
heart
http://www.kffkr.com/wp-images/kiss.png love
http://www.kffkr.com/wp-images/kiss2.png kiss
check
high
rain
idea

Emoji phrase
curry
banana
apple
cocktail
ale

Emoji phrase
whale